PIN-UP Partners – direct advertiser and affiliate program of the PIN-UP iGaming products | 10+ GEOS | CPA up to $200 | Revshare up to 50%

Guide šŸŸ¢ How to Start With PropellerAds Traffic Source?

I'm currently using traffic from PropellerAds, and the overall user experience has been really great. However, I've run into a question: I'm trying to figure out which affiliate networks' offers perform best with PropellerAds traffic.

Right now I'm using GoldenGoose (GG), but they don't offer any external third-party APIs, which makes it difficult for me to set up automation and integration. I also noticed that Zeydoo doesn't support PropellerAds traffic.

Could you let me know if there are any other affiliate networks that work well with PropellerAds traffic?

I think this is a question for @Akahma :)
 
Golden Goose is also a solid option. You might want to check Traffic Company as well
I've checked out the content in the link and gave it a like. It's really excellent, and I'll be sure to study it carefully going forward.
 

How to Add PropellerAds Traffic Source to BeMob Tracker​

Let’s see how we can add PropellerAds as traffic source to your BeMob tracker


Select Traffic Sources from the main menu, and then open the drop-down menu near the + New button and select + New From Template.

You’ll see a popup like this one:


Search for ā€œpropelleradsā€ and click on the logo from the list.

And you’ll see PropellerAds template like this one:


This is a generic template. As you can see, there are a few things we need to ā€œfixā€ here.

First, you need to enter the correct ā€œPostback URLā€. There are 3 placeholders in the URL (REPLACE), which we need to update.

We need to find the correct values from your PropellerAds account. Open the Tracking page in your PropellerAds account:


And click on the BeMob icon.


Now, click on the ā€œCopy this S2S Postback URLā€ link. This will copy the correct Postback URL for BeMob (with correct tokens added!).

Your Postback URL might look something like this:

http://ad.propellerads.com/conversion.php?aid=1234567&pid=&tid=678901&visitor_id={externalId}&payout={payout}

Head back to that BeMob popup, and paste that URL in the Postback URL field, like this:


Make sure there is a number under the ā€œaidā€ and ā€œtidā€ parameters. Also, check that you have {externalId} and {payout} in the URL. This should all be there by default.

Next, the ā€œcostā€ parameter is missing. You’ll need to manually add that. So, under the ā€œQuery paramā€ column add ā€œcostā€ and under the ā€œTokenā€ column put ā€œ{cost}ā€ (check my screenshot above). This way your costs will be properly tracked.

You’ll also notice that there are only 3 custom tracking tokens set here. The most important one ā€œzoneidā€ is here, so this time we won’t be adding any new tracking tokens here. I’ll explain later why.

Once you are done, hit the Save button.


Other Ad Formats​

I mentioned above that the template you worked with is generic, because it only has 3 custom tokens, which means it only tracks some basic traffic source fields like zoneid.

If you try to add a new traffic source again, like this:


You’ll notice there are a lot more custom tracking tokens in ā€œPropellerAds: Popunderā€ template:


The only thing here you would need to update is the Postback URL, because as you can see the cost token is already there, and also 10 custom tracking tokens.

I would suggest you add ā€œPropellerAds: Popunderā€ as a traffic source, and use that one for all your Onclick campaigns in BeMob.

Same thing goes for Survey Exit ad format:


You’ll see the cost token and 10 custom tracking tokens are already here:


The only thing you need to do is enter the correct Postback URL.

You can do the same for Push notifications (select CPA Goal or CPC):


And you’ll see cost token and 10 custom tracking tokens are here also:


Don’t forget to ā€œfixā€ the Postback URL.

Let’s check the Interstitial ad format.


Pick between CPA Goal or CPC options. Don’t pick CPM because you can’t track CPM costs for this format properly.


This template looks good also. The only thing you need to fix here is the Postback URL (as I explained above).

If you remember, there are 5 different ad formats available on PropellerAds - and so far we covered 4 of them (Popunder, Push, Survey Exit and Interstitial). The only one that is missing here is the Telegram Ads template (which hasn’t been added to @BeMob yet - I guess because it’s still new).

That’s not a problem - we’ll add that manually. Here’s how.


Select Traffic Sources and click on the + New button. An empty template will appear:


There are a few things we need to fill out here.
  1. Name - put ā€œPropellerAds: Telegram Adsā€
  2. Postback URL - get the correct URL from Tracking page (as I explained above)
  3. And now the tracking tokens.
Here is a table for you:


NameQuery paramTokenName
External ID visitor_id${SUBID}
Costcost{cost}
Custom 1zoneid{zone_id}Zone ID
Custom 2campaignid{campaign_id}Campaign ID
Custom 3bannerid{bannerid}Banner ID
Custom 4subzone_id{subzone_id}Subzone ID
Custom 5browser{browser}Browser
Custom 6browserversion{browser_version}Browser version
Custom 7zone_type{zone_type}Zone Type
Custom 8carrier{carrier}Carrier
Custom 9country{country}Country
Custom 10useragent{useragent}User Agent

Like this:


Maybe @BeMob can add this in the future as a template?


šŸ’” TIP: With PropellerAds, both {zoneid} and {zone_id} tokens will work.
 

How to Add PropellerAds Traffic Source to BeMob Tracker​

Let’s see how we can add PropellerAds as traffic source to your BeMob tracker

View attachment 76708

Select Traffic Sources from the main menu, and then open the drop-down menu near the + New button and select + New From Template.

You’ll see a popup like this one:

View attachment 76707

Search for ā€œpropelleradsā€ and click on the logo from the list.

And you’ll see PropellerAds template like this one:

View attachment 76711

This is a generic template. As you can see, there are a few things we need to ā€œfixā€ here.

First, you need to enter the correct ā€œPostback URLā€. There are 3 placeholders in the URL (REPLACE), which we need to update.

We need to find the correct values from your PropellerAds account. Open the Tracking page in your PropellerAds account:

View attachment 76705

And click on the BeMob icon.

View attachment 76706

Now, click on the ā€œCopy this S2S Postback URLā€ link. This will copy the correct Postback URL for BeMob (with correct tokens added!).

Your Postback URL might look something like this:

http://ad.propellerads.com/conversion.php?aid=1234567&pid=&tid=678901&visitor_id={externalId}&payout={payout}

Head back to that BeMob popup, and paste that URL in the Postback URL field, like this:

View attachment 76714

Make sure there is a number under the ā€œaidā€ and ā€œtidā€ parameters. Also, check that you have {externalId} and {payout} in the URL. This should all be there by default.

Next, the ā€œcostā€ parameter is missing. You’ll need to manually add that. So, under the ā€œQuery paramā€ column add ā€œcostā€ and under the ā€œTokenā€ column put ā€œ{cost}ā€ (check my screenshot above). This way your costs will be properly tracked.

You’ll also notice that there are only 3 custom tracking tokens set here. The most important one ā€œzoneidā€ is here, so this time we won’t be adding any new tracking tokens here. I’ll explain later why.

Once you are done, hit the Save button.


Other Ad Formats​

I mentioned above that the template you worked with is generic, because it only has 3 custom tokens, which means it only tracks some basic traffic source fields like zoneid.

If you try to add a new traffic source again, like this:

View attachment 76709

You’ll notice there are a lot more custom tracking tokens in ā€œPropellerAds: Popunderā€ template:

View attachment 76713

The only thing here you would need to update is the Postback URL, because as you can see the cost token is already there, and also 10 custom tracking tokens.

I would suggest you add ā€œPropellerAds: Popunderā€ as a traffic source, and use that one for all your Onclick campaigns in BeMob.

Same thing goes for Survey Exit ad format:

View attachment 76710

You’ll see the cost token and 10 custom tracking tokens are already here:

View attachment 76712

The only thing you need to do is enter the correct Postback URL.

You can do the same for Push notifications (select CPA Goal or CPC):

View attachment 76718

And you’ll see cost token and 10 custom tracking tokens are here also:

View attachment 76720

Don’t forget to ā€œfixā€ the Postback URL.

Let’s check the Interstitial ad format.

View attachment 76721

Pick between CPA Goal or CPC options. Don’t pick CPM because you can’t track CPM costs for this format properly.

View attachment 76717

This template looks good also. The only thing you need to fix here is the Postback URL (as I explained above).

If you remember, there are 5 different ad formats available on PropellerAds - and so far we covered 4 of them (Popunder, Push, Survey Exit and Interstitial). The only one that is missing here is the Telegram Ads template (which hasn’t been added to @BeMob yet - I guess because it’s still new).

That’s not a problem - we’ll add that manually. Here’s how.

View attachment 76715

Select Traffic Sources and click on the + New button. An empty template will appear:

View attachment 76716

There are a few things we need to fill out here.
  1. Name - put ā€œPropellerAds: Telegram Adsā€
  2. Postback URL - get the correct URL from Tracking page (as I explained above)
  3. And now the tracking tokens.
Here is a table for you:


NameQuery paramTokenName
External IDvisitor_id${SUBID}
Costcost{cost}
Custom 1zoneid{zone_id}Zone ID
Custom 2campaignid{campaign_id}Campaign ID
Custom 3bannerid{bannerid}Banner ID
Custom 4subzone_id{subzone_id}Subzone ID
Custom 5browser{browser}Browser
Custom 6browserversion{browser_version}Browser version
Custom 7zone_type{zone_type}Zone Type
Custom 8carrier{carrier}Carrier
Custom 9country{country}Country
Custom 10useragent{useragent}User Agent

Like this:

View attachment 76719

Maybe @BeMob can add this in the future as a template?


šŸ’” TIP: With PropellerAds, both {zoneid} and {zone_id} tokens will work.

Of course! It's been in my bookmarks all along, and I actually have an account on your platform! Thanks so much for sharing the tutorial — it's been incredibly helpful for me!

From the very beginning of the design phase, my program has had a dedicated DDD domain layer specifically set up for BeMob.
 

How to Add PropellerAds Traffic Source to Skro Tracker​

Next - let’s see how we can add PropellerAds to @Skro tracker. Logon to your Skro account, select Traffic Source from the left menu and then click on the + Create button.


There are plenty of templates already available in Skro tracker, but for no just search for ā€œpropelleradsā€:


For PropellerAds, there is only one template available here. Click on the logo, and you’ll see a popup like this one:

(if Wordspace is not selected, select Master from the first drop-down menu)

As you can see, there are 3 REPLACE placeholders in the Postback URL that we need to fix.

Hop over to Tracking page in PropellerAds account:


There isn’t a template for Skro ready here (maybe @PropellerAds can add that in the future), so we will have to do it manually. Select ā€œOther tracker or CPA Networkā€.


And then click on the ā€œCopy this S2S Postback URLā€ link. You will need to paste that URL in the Postback URL field in Skro.

The URL you will get from PropellerAds will look something like this:

http://ad.propellerads.com/conversion.php?aid=1234567&pid=&tid=456678&visitor_id=${SUBID}&payout=${PAYOUT}

You can paste that here:


But you will need to replace 2 things in this URL:
  • Replace ${SUBID} with {externalId}
  • Replace ${PAYOUT} with {payout}
Like this:


Your final Postback URL should then look something like this:

http://ad.propellerads.com/conversion.php?aid=1234567&pid=&tid=456678&visitor_id={externalId}&payout={payout}

Keep in mind that every affiliate will have different numbers under ā€œaidā€ and ā€œtidā€ parameters. That’s fine.

Let’s check the tokens.


Skro comes with 6 tracking tokens added. This will do for most ad formats - so you can just go ahead and Save & Close that now.


šŸ’” TIP: With PropellerAds, both {zoneid} and {zone_id} tokens will work.
 

How to Add PropellerAds Traffic Source to MaxConv Tracker​

Adding traffic sources to MaxConv tracker is pretty easy.


Select Traffic Sources from the main menu, and then click on the + Create button.

You’ll see a popup with a lot of templates. Search for ā€œpropelleradsā€ and click on the logo.


You’ll get a popup like this one:


As you can see, we have a Postback URL with a few {REPLACE} placeholders which means we need to get the correct Postback URL from PropellerAds Tracking page.


Unfortunately, MaxConv isn’t added here, so we’ll have to update the Postback URL manually. Click on the ā€œOther tracker or CPA Networkā€ button.


And then click on the ā€œCopy this S2S Postback URLā€ link. You’ll need to paste the URL in your MaxConv popup:


Make sure there are numbers under ā€œaidā€ and ā€œtidā€ parameters. There are still 2 things you need to update here:
  • Replace ${SUBID} with {external_id}
  • Replace ${PAYOUT} with {payout}
So your Postback URL looks something like this:


Now, let’s check the tracking tokens. Scroll down a bit.

Maybe @PropellerAds can add @MaxConv to their Tracking page?


ā€œCostā€ and ā€œExternal Click IDā€ tokens are here which is good. But as you can see, there are only 3 custom tokens added here. That’s because this is a generic template which can track most of the ad formats on PropellerAds. You can save this traffic source for now.


Other Ad Formats​

I already explained this for BeMob tracker - it’s pretty much the same with MaxConv tracker templates. The template you worked with is generic, because it only has 3 custom tokens, which means it only tracks some basic traffic source fields like zoneid.

If you try to add a new traffic source again, like this:


You’ll notice there is a different template for each ad format:
  • Popunder
  • Interstitial
  • Survey Exit
  • Push Notifications
I suggest you add every one of them. I see that ā€œCostā€ and ā€œExternal Click IDā€ tokens are added for most of them - so the only thing you’ll need to ā€œfixā€ is the Postback URL (which I already explained how). Keep in mind that for some formats you won’t be able to track CPM costs.

The only template that is missing here is the one for Telegram Ads, so I’ll show how to add that one.

In the Create Traffic Source popup, select the + Custom Traffic Source button:


You’ll get an empty popup, like this one:


A few things we need to add here:
  • Name - you can put something like ā€œPropellerAds: Telegram Adsā€
  • Postback URL - tick the ā€œTraffic source postback URLā€ and enter the correct Postback URL (as I explained above)
  • And the Tracking tokens…
I’ll show them in table, so it’s easier for you to copy paste them:


NameParameterPlaceholderAlias Name
Costcost{cost}
External Click IDsrc_clid${SUBID}
Token 1zoneid{zone_id}Zone ID
Token 2campaignid{campaign_id}Campaign ID
Token 3bannerid{bannerid}Banner ID
Token 4subzone_id{subzone_id}Subzone ID
Token 5browser{browser}Browser
Token 6browserversion{browser_version}Browser version
Token 7zone_type{zone_type}Zone Type
Token 8carrier{carrier}Carrier
Token 9country{country}Country
Token 10useragent{useragent}User Agent

Once you add all of them, your popup show look something like this:


Now you can click the Save button.

Maybe @MaxConv can add this template in the future?


šŸ’” TIP: With PropellerAds, both {zoneid} and {zone_id} tokens will work.
 

Conversion Tracking​

If you want to see conversion on the PropellerAds statistics page or run campaigns on CPA Goal pricing mode, you must have a working Postback URL set up correctly. This means your tracker must post conversions back to your traffic source.

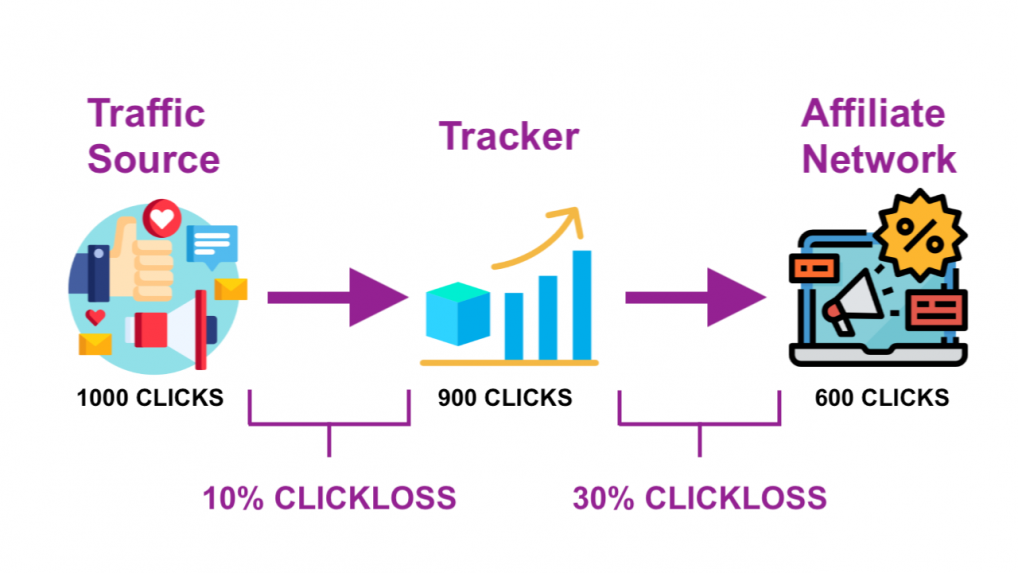
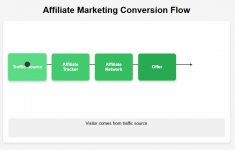
Here is a simple flow:


To make sure everything is properly set up, you can use the Conversion Tracking page for testing. Hopefully, by now you have added PropellerAds as traffic source to your tracker and you’ve also added the correct Postback URL as I’ve explained in this guide.


Conversion Tracking with BeMob tracker​

Ok, let’s start with @BeMob. You’ll need to create a test campaign in BeMob. For this test campaign you won’t need a landing page or the offer. The only thing we need is to generate a test visit from PropellerAds traffic source to your tracker. Once we have at least 1 test visit visible in the tracker, we can generate a test (fake) conversion in your tracker, and then if your Postback URL is correct, your tracker will post back that conversion to the traffic source.

Open the Campaigns page in BeMob and click on the + New button.


You’ll see a Create Campaign popup, like this one:


As you can see, we need to fill out a few fields here, for this test campaign:

  • Name - put whatever you want, I used ā€œConversion Testā€
  • Make sure you select PropellerAds as your traffic source
  • Select Built-in Flow
  • Turn off the checkbox for Landings
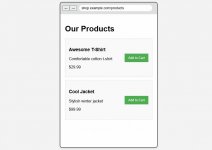
And for the ā€œofferā€, you can just create an ā€œofferā€ that redirect to Google, like this:


Save this campaign. You’ll get the campaign tracking link in a popup like this one:


Click on the Copy button near the Campaign URL. You’ll need to paste this URL in the PropellerAds Conversion Test page:


Paste that URL in the ā€œ1. Enter the target URL used in the campaign you want to testā€ field. After that, click on the ā€œCreate test bannerā€ button.

A new tab will open with a banner like this one:


Click on that banner. You’ll be redirected to your Campaign URL (and if you’ve used google.com URL as the ā€œofferā€ page, your tracker will redirect you to Google).

Now, you should have at least 1 test visit in your tracker - the one you just made by clicking on that banner.


Find that test campaign in your tracker and double click on it. A report will open.


Select Live Visits from the drop down menu. Your test visit should be there, like this:


If it’s not, refresh the page a few times. It usually comes up within a minute or two.

See that Click ID? In my example it’s ā€œS7PGeLA7qHEyjGBWTb9C2Vā€, yours will be different.

Copy that Click ID - you’ll need it soon.

Click on the settings (gear) icon near your name in the top right corner to open the Settings page, and select Upload Conversions from the menu then:


Paste that Click ID in this field:


And click on the Upload button. You should see a small popup saying your conversion was uploaded successfully.

Now go back to your campaign, and select Conversions from the main menu:


You should see your conversion there. If not, wait a minute or two and reload the page.

That means the conversion is added to your tracker. Let’s see if the tracker was able to successfully post back those conversions back to the traffic source. You can check that from the Postbacks tab.


And yes it was! Status code 200 means the postback was successful.

The last thing you’ll want to check is the Conversion Tracking page in PropellerAds.


Hit the Update button.


And you should see something like this. If not, try again a few times. If you don’t see a conversion here in the next 15 minutes, it might be that your Postback URL is not correct.

You are now ready to run campaigns on CPA Goal pricing model!


Conversion Tracking with Skro tracker​

If @Skro tracker is your weapon of choice, you’ll want to complete these steps so you can run CPA Goal campaigns.

First, you’ll need to create a test campaign. Select Campaigns from the left menu, and then click on the + Create button.


Select PropellerAds as your traffic source:


Select Master as Workspace and give your campaign a name, like this:


Select a test (fake) offer for this campaign (or use a real one), like I did:


You don’t need a landing page for this test, so select Use offers only. Once you click Save, you’ll see a popup like this one:


Click on the COPY button near the Campaign Tracking URL. You’ll need to paste that URL on the Conversion Tracking page in PropellerAds:


Paste the URL and then click on the Create test banner button. A new tab will open with a banner like this one:


Click on the banner, and you’ll be redirected to your Skro Campaign URL. Which means there is now a test visit in your Skro reports for this test campaign.


If you see at least one visit there, open the Clicks report from the left menu and find the Click ID for that visit.


In my example, Click ID is ā€œcvhrs43ececc73dbg66gā€ - yours will be different.

Mark that Click ID and then click on the + Add Conversion button, like this:


You’ll see a popup similar to this one:


Enter any value under Payout (it can be zero) and click on the Add button. And the conversion should be sent back to your traffic source.

To be sure, go to Postbacks report page, and look for that Click ID:


If you see a 200 OK in the Status column, that means your postback was successful.

The last thing you’ll want to check is the Conversion Tracking page in PropellerAds.


Hit the Update button.


And you should see something like this. If not, try again a few times. If you don’t see a conversion here in the next 15 minutes, it might be that your Postback URL is not correct.

You are now ready to run campaigns on CPA Goal pricing model!


Conversion Tracking with MaxConv tracker​

And now let’s see how we can do this with the @MaxConv tracker.


Select Campaigns from the main menu and click on the + Create button.


Enter a name for the campaign, select the traffic source and click on the Next button.


Turn off the Landers. For the ā€œofferā€ you can put whatever you want. Click on the Save button.


Click on the Copy button near the Campaign URL. This is the URL you’ll need to paste in the PropellerAds Conversion Test page.


Paste the URL into the ā€œ1. Enter the target URL used in the campaign you want to testā€ and then click on the ā€œCreate test bannerā€ button.


A new popup will open. Click on that banner. You should be redirected to your Campaign URL from that banner, which means your MaxConv tracker should have at least 1 visit recorded now for that test campaign.


Refresh the campaign page, and you should see that test visit.

Open the Events report and you should be able to see your test visit there:


Copy that Click ID - you’ll need it soon. In my case it’s ā€œm8oq7f4ilkuberunyoz7wjh16uā€ - yours will be different.

Now, open the Conversions page in MaxConv, and click on the + Upload button:


In the popup, paste that Click ID.


And click on the Upload button. You should see a notification that conversion was successfully uploaded.

Let’s check that. Hit the Refresh button on the Conversions page.


And there it is. This just means a conversion is added to MaxConv tracker. We still need to check if the tracker was able to post back that conversion back to traffic source.

Open the Events report and you should see something like this:


Looks like everything is fine. Let’s check the PropellerAds Conversion Test page:


Hit the Update button.


And there it is. Everything works fine.

You are now ready to run campaigns on CPA Goal pricing model!


šŸ’” TIP: If you want to run campaigns on CPA Goal pricing model, make sure you complete this step first.
 

Attachments

  • 1772698181651.jpeg
    1772698181651.jpeg
    34.1 KB · Views: 36

Retargeting with Audiences​

Not many traffic sources offer retargeting options, but PropellerAds does.

Retargeting is a form of online targeted advertising directed to users who have visited your website but left without completing a desired action (purchase, deposit, sign-up, etc.).

PropellerAds offers a pixel-based retargeting feature, which means you’ll have to add some code to your landing pages which will then add (or remove) users from the audience.

There are 2 ways you can collect audiences. One is directly from a campaign (by adding users that converted to your audience) or from your landing page (ie. the users that added a product to the cart, but didn’t complete the purchase).

If you are running campaigns with CPA Goal pricing model, then PropellerAds will automatically stop showing ads to users that have converted in that campaign. But if you are running campaigns on CPC/SmartCPC or CPM/SmartCPM you need a way to exclude converted users from your campaign. There is no need to show the same ad for the same offer to a user that has already completed the offer.

Do to this, you’ll need to collect converted users into a new audience, and at the same time exclude the users from that audience in the same campaign. In the Create campaign form, scroll down to the ā€œCollect an audience for retargetingā€ section:


And select ā€œCollect users who completed conversions in this campaignā€. You’ll need to enter the name for that audience - you can use something like ā€œCampaign 1 - Converted Usersā€. Type the name in the field and hit enter. The new audience should now be available in the drop-down menu. Select it. Now all the users that convert within this campaign, will be automatically added to this audience by the PropellerAds system.

Next - we need to make sure ads are no longer shown to those users. That means we need to exclude users from that audience.

Scroll up a bit, until you see this part:


Select Exclude, and try to find the audience in the field.

NOTE: Sometimes the new audience doesn’t show up in this field immediately. The only solution is to refresh the page, which is a shame since you would have to fill out all the fields again, and that could take some time. The solution? Save the campaign as Draft (or submit for review) and click on the Edit campaign immediately after that. Once you open the Edit campaign form, the new audience should be there. If not - refresh the Edit campaign form page a few times.

Maybe @PropellerAds could address this.

This is one way you can use audiences in PropellerAds. Collect and exclude by using the PropellerAds system within the campaign settings.

The other way is actually the…

Retargeting​

Let’s say you have a webshop, and in that webshop you have a product page, cart page, order page and thank you page.

When the visitor adds a product to a cart, they usually go to a cart page, review the cart and if they are happy, continue to the order page where they enter some personal (and payment) details and complete the order. The webshop will then usually redirect them to a thank you page where they will be able to see some info about their order, ie. the order number, shipping details, etc.

This is the ideal case. You have a visitor who makes a purchase.

But what if a visitor comes, adds a product to cart, reviews the cart.. And don't make a purchase? Wouldn’t it be great if you could try to ā€œpursueā€ that visitor again, to come back to your page and finish the order? Or maybe you’d like to offer him a small discount, just so he finishes the order? Remember, you already paid for traffic the first time that visitor came to your page, and by adding product(s) to cart, that visitor showed interest in your product.

The only problem here is that since he didn’t complete the order, you didn’t collect any data from that user - so for example, you don’t have his email, and there is no way you can contact him.

Except there is.

If you had created an audience in PropellerAds, you could have put a pixel tracking code on cart page (or when a visitor adds a product to cart) and that code would add that visitor to your audience. Which means now you would have a way to reach out to that visitor again. Something like this:


And now if you go and create a new campaign targeting only users from that audience, you could show them your ads again. Maybe something like ā€œFinish your order and get a 10% discount - expires today!ā€.

The only problem with this approach is - that now when the visitor completes the order, he is still in the audience, and your ads are still being shown to that same user. Lucily, there is a way to exclude that visitor from the audience when he completes the order.

You’ll just have to add another pixel code (or JavaScript) on the thank you page, because when a visitor is redirected to the thank you page, that means he completed the offer.

<img src="//my.rtmark.net/img.gif?f=off&lr=1&partner=000000" width="1" height="1" />

By adding the ā€œf=offā€ parameter to tracking code, PropellerAds will remove that user from the audience.

Something like this:


That way your audience will only have visitors that have added a product to cart, but haven’t made the order. Smart, huh?

Now you can create a campaign that will target only those visitors:


šŸ’” TIP: You can read more about retargeting here.
 

Attachments

  • 1772786296924.jpeg
    1772786296924.jpeg
    37.8 KB · Views: 41
  • 1772786296940.jpeg
    1772786296940.jpeg
    37.8 KB · Views: 32

Launching a new onClick campaign​

Let’s start with the onClick (popunder) format, since it’s the ad format with the most volume on PropellerAds.

Click on the Create campaign button in the top navigation bar, and soon you’ll see a Create campaign form, like this one:


By default, Onclick ad format will be selected.

Let’s go over thru all the fields in this form:
  • Campaign Name - this will be visible to you only. Put something that’s easy to remember and use.
  • Add to folder - if you’ve already created a folder, you can select it from the drop down menu. In case you haven’t, you can create a folder so it’s easier to organize your campaigns. You can do that from the Statistics page by clicking on the Folder icon on the right hand side (below the timezone dropdown menu). You can read more about this feature here.
  • Choose Advertising Format - since this post is all about creating Onclick campaigns, select ā€œOnclick (Popunder and Direct Click)ā€
  • Traffic Type - now, there are 3 different traffic types under Onclick advertising format. The good thing here is that you can’t mix them. If you want an Onclick/Websites combo, you’ll have to pick that. In case you want to use Onclick as the main advertising format and direct click as traffic type, you’ll have to create another campaign. Since the performance of each traffic type can vary, I suggest you have separate campaigns for each traffic type.
  • Pricing Model - for Onclick campaigns, you can pick between CPA Goal, SmartCPM or CPM. If you are just starting out, I suggest you pick CPA Goal.

  • Multiformat Campaign - there is an option to automatically create an Interstitial campaign in addition to this one, but I’d always suggest you have 1 campaign per ad format. So one for Onclick and the other for Interstitial. I usually turn this OFF.
  • Target URL - you’ll need to paste your Campaign URL (that you got in your tracker) here.
  • Traffic Sources - for Onclick campaigns, you can pick between Exclusive Inventory and/or Partner Traffic. With Partner Traffic turned on, you might get more traffic and conversions. If you want to test this separately, you can always create one Onclick campaign for Exclusive Inventory and the other for Partner Traffic and compare the performance.


If you made the landing page, then I guess you can turn ON the ā€œI have access to source code of this landing pageā€ checkbox, but that’s just an ad for ProPush. If you want to receive traffic from Anti-AdBlock zones, don’t forget to tick that checkbox also.
  • Countries & Conversion Price - keep in mind that you can add more countries in the same row, as long as you want to use the same price for traffic. In my example, I’ve added USA and Canada in the first row, and picked $1 for CPA Goal cost. And let’s say I wanted to bid CPA $2 for a different country - in this example New Zealand, I would just click on the + Add another country rate button and add a new row. In case you want to target specific cities or states, you’ll see there is an option for that also.

  • Advertising Budget (USD) - The budgets are always set in USD currency. When starting out, I’d alway suggest you put some values under Daily budget and Total budget (or at least Daily budget). That way in case something is wrong with your campaign (maybe your tracking isn’t working correctly), at least you won’t burn all your budget because you see a mistake you made. There is also a nice feature available here - adding an alert when the remaining total budget is 20% or less.

  • Targeting - this is a pretty big section, so I’ll split this in 2 parts.

  • Platform - you can choose between Mobile or Desktop (or choose both)
  • OS (operating system) - once you choose the platform, you’ll be able to pick the OS-es you wish to target. You can choose more of them. For example, if you choose Mobile as a platform, you’ll be able to pick Android here. As with most filters in Targeting, you can choose if you want to Include this or Exclude from your targeting.
  • OS Version - once you pick the OS, you’ll be able to choose the versions from this drop-down menu.
  • Graphics card - something that was introduced recently, the option to only GeForce graphic card or specific RTX or GTX series.
  • Device - this type of targeting is available only for iOS devices. iPad and iPhones are available if you choose iOS as OS.
  • Browser - if you want to target specific browsers (or exclude them), this is the setting you’ll want to use.
  • Browser language - in case you want to show your ads only to users with specific browser language selected, use this targeting option.

  • Connection type - you can choose between 3G/LTE (which is carrier traffic) or WIFI. If you are running mVas, most of the time you’ll want to use the 3G/LTE option.
  • Proxy - by default, No Proxy is selected. If for some reason you want to include proxy traffic, you can choose that here.
  • Mobile ISP - if you want to pick the mobile carrier, you have to select the country first, and then 3G/LTE under Connection type.
  • Zone limitation - if you want to run a whitelist campaign, paste the zones here, and select Include. If you want to exclude (blacklist) some zones in your campaign, paste them here and select Exclude.
  • Subzone limitation - some ad formats support subzones, so you can also include or exclude subzones here.
  • Audiences - I’ve explained audiences in previous posts, so you can read more about audiences and how to use them there.
  • Collect an audience for retargeting - if you want to build an audience of converted users, you can do that from this menu. When running CPA campaigns, you don’t have to do this. Later, you can use this audience to show your ads again to the users which converted in your campaign.

  • Campaign Schedule - by default, this section is collapsed, but you can open it if you click on the section title, and then you’ll see something like this:


In case you have a reason not to run your campaign on some days in week (or some hours) this is the place where you can modify that.

Once you are happy with your campaign settings, you’ll want to make sure these two checkboxes are checked:


And then you can click on the Start Campaign button. (or Save as Draft if you want to make some changes later). Once you do that, your campaign will be sent to moderation:


And that’s it. Usually, campaigns are approved pretty quickly here. (within a few minutes)


Free landing pages​

Looking for some free landing pages? Check out these threads:

šŸ’” TIP: Make sure you use a fast tracker if you are buying a lot of traffic.
 

Launching a new Push Notifications campaign​

Let’s see what we need to do to create a new push notifications campaign!


  • Campaign Name - put whatever you want here. (or read this)
  • Add to folder - not required, but you can use this if you want to organize (or group) your campaigns.
  • Advertising Format - since this is a guide on how to create a push campaign, select Push Notifications.
  • Push Notification Types - we are creating a classic push campaign here, so select Classic Push.
  • Pricing Model - you can choose between 4 pricing models here; CPA Goal, SmartCPC, CPC and CPM. If you plan to use CPC pricing models, you might consider using an optimizer tool for your campaign.
Multiformat Campaign


There is an option to create additional campaigns for different ad formats from this page, but I’d recommend you always create one campaign per ad format. So, I’d suggest you turn these off.


  • Target URL - you’ll need to paste your Campaign URL (that you got in your tracker) here.
  • I have access to source code of this landing page - if you made your landing page, then you can check this box, but this is just an ad for Propush.
  • User activity for the Push Campaign - different activity levels have different performance. Usually, ā€œfreshā€ subscribers (High activity) tend to convert more often, but that means traffic coming from High activity is usually more expensive. If you’ve set up a {user_activity} token in your tracker, you’ll be able to monitor the performance per user activity level.

  • Countries & Conversion Price - keep in mind that you can add more countries in the same row, as long as you want to use the same price for traffic. In my example, I’ve added USA and Canada in the first row, and picked $1 for CPA Goal cost. And let’s say I wanted to bid CPA $2 for a different country - in this example New Zealand, I would just click on the + Add another country rate button and add a new row. In case you want to target specific cities or states, you’ll see there is an option for that also.
  • Advertising Budget (USD) - The budgets are always set in USD currency. When starting out, I’d alway suggest you put some values under Daily budget and Total budget (or at least Daily budget). That way in case something is wrong with your campaign (maybe your tracking isn’t working correctly), at least you won’t burn all your budget because you see a mistake you made. There is also a nice feature available here - adding an alert when the remaining total budget is 20% or less.
Next.. Targeting.


  • Platform - you can choose between Mobile or Desktop (or choose both)
  • OS (operating system) - once you choose the platform, you’ll be able to pick the OS-es you wish to target. You can choose more of them. For example, if you choose Mobile as a platform, you’ll be able to pick Android here. As with most filters in Targeting, you can choose if you want to Include this or Exclude from your targeting.
  • OS Version - once you pick the OS, you’ll be able to choose the versions from this drop-down menu.
  • Browser - if you want to target specific browsers (or exclude them), this is the setting you’ll want to use.
  • Browser language - in case you want to show your ads only to users with specific browser language selected, use this targeting option.

  • Connection type - you can choose between 3G/LTE (which is carrier traffic) or WIFI. If you are running mVas, most of the time you’ll want to use the 3G/LTE option.
  • Proxy - by default, No Proxy is selected. If for some reason you want to include proxy traffic, you can choose that here.
  • Mobile ISP - if you want to pick the mobile carrier, you have to select the country first, and then 3G/LTE under Connection type.
  • Zone limitation - if you want to run a whitelist campaign, paste the zones here, and select Include. If you want to exclude (blacklist) some zones in your campaign, paste them here and select Exclude.
  • Push Notifications Audiences - I’ve explained audiences in previous posts, so you can read more about audiences and how to use them there.


You can also target users based on their interests, gender and age. Not sure how PropellerAds collects this data.


  • Collect an audience for retargeting - if you want to build an audience of converted users, you can do that from this menu. When running CPA campaigns, you don’t have to do this. Later, you can use this audience to show your ads again to the users which converted in your campaign.
  • Campaign Schedule - by default, this section is collapsed, but you can open it if you click on the section title, and then you’ll be able to pick days and times when you want your campaign to run.

Push Notifications Creatives​

You’ll need some creatives for your push notification campaigns. There are 200 free creatives available here:


Let’s take a look at this part of the form.


Auto creatives are a relatively new option. If you don’t have any creatives, you can choose this option and see how it works. Again, if you want to try this, create a separate campaign. If you want to run your creatives, then create a separate campaign, so it’s easier to compare the performance.

In case you want to add your custom creatives, turn the Auto creatives off, and then you’ll see a form like this:


  1. You can leave the ā€œAuto-badge selection for classic Android push-notificationsā€ turned on, so the system will pick the best badge for your notifications
  2. Title - You can use emojis in your title. The limit is 30 characters.
  3. Description - You can use emojis in your description. The limit is 40 characters.
  4. Icon - add an icon that is 192x192 pixels in dimensions. This is a required field.
  5. Landscape - You can add a landscape image also, but it’s not required.
  6. Add another creative for testing - if you want to add more creatives, use this button. There is a limit of 8 creatives per one campaign.
You’ll see a preview of your notification in the right side, like this:


And the last part of the form…


  • Use existing creative - if you want to ā€œpullā€ a creative from an existing campaign, you can use this field.
  • Automatically start a campaign after moderation (takes up to 24 hours) - if you want to start the campaign as soon as it’s approved, check this box.
  • I declare and guarantee that my campaign meets the Quality Guidelines - make sure your campaign follows the rules before submitting it for review.
  • Start Campaign - once you are ready, hit this button to submit the campaign for review.

šŸ’” TIP: Create a separate campaign for classic push and separate campaign for in-page push format because the performance can vary.
 

Launching a new Survey Exit campaign​

Survey Exit format was introduced in 2023. Since traffic from this ad format comes from a survey page, you might try running a direct link campaign to the offer with the landing page (or split test). Since the audience here is already warmed-up, you might see higher than usual conversion rates.

The form to launch a new Survey Exit campaign is pretty simple.


  • Campaign Name - put whatever you want here. (or read this)
  • Add to folder - not required, but you can use this if you want to organize (or group) your campaigns.
  • Advertising Format - since this is a guide on how to create a Survey Exit campaign, select Survey Exit.
  • Pricing Model - you can choose between 3 pricing models here; CPA Goal, SmartCPC and CPC. If you plan to use the CPC pricing model, you might consider using an optimizer tool for your campaign.

  • Target URL - you’ll need to paste your Campaign URL (that you got in your tracker) here.
  • I have access to source code of this landing page - if you made your landing page, then you can check this box, but this is just an ad for Propush.
  • Countries & Bid - keep in mind that you can add more countries in the same row, as long as you want to use the same price for traffic. In my example, I’ve added USA, and picked $0.015 for CPC cost.
  • Target by - you can also target different cities or states, if you want to.

  • Advertising Budget (USD) - The budgets are always set in USD currency. When starting out, I’d alway suggest you put some values under Daily budget and Total budget (or at least Daily budget). That way in case something is wrong with your campaign (maybe your tracking isn’t working correctly), at least you won’t burn all your budget because you see a mistake you made. There is also a nice feature available here - adding an alert when the remaining total budget is 20% or less.
And now the Targeting part of the form.


  • Platform - you can choose between Mobile or Desktop (or choose both)
  • OS (operating system) - once you choose the platform, you’ll be able to pick the OS-es you wish to target. You can choose more of them. For example, if you choose Mobile as a platform, you’ll be able to pick Android here. As with most filters in Targeting, you can choose if you want to Include this or Exclude from your targeting.
  • OS Version - once you pick the OS, you’ll be able to choose the versions from this drop-down menu.
  • Device - this type of targeting is available only for iOS devices. iPad and iPhones are available if you choose iOS as OS.
  • Browser - if you want to target specific browsers (or exclude them), this is the setting you’ll want to use.
  • Browser language - in case you want to show your ads only to users with specific browser language selected, use this targeting option.
  • Connection type - you can choose between 3G/LTE (which is carrier traffic) or WIFI. If you are running mVas, most of the time you’ll want to use the 3G/LTE option.


  • Mobile ISP - if you want to pick the mobile carrier, you have to select the country first, and then 3G/LTE under Connection type.
  • Zone limitation - if you want to run a whitelist campaign, paste the zones here, and select Include. If you want to exclude (blacklist) some zones in your campaign, paste them here and select Exclude.
  • Subzone limitation - some ad formats support subzones, so you can also include or exclude subzones here.


  • Audiences - I’ve explained audiences in previous posts, so you can read more about audiences and how to use them there.
  • Gender - you can choose between Man and Woman (or both)
  • Age - you can choose between age 3 groups (or all of them)
  • Survey type - since there are 3 types of surveys available, you can choose from which survey type you want to buy traffic. If you are using the {survey_exit_type} token and tracking this in your tracker, you could monitor the performance based on the type of survey.
And the last part of the form…


  • Collect an audience for retargeting - if you want to build an audience of converted users, you can do that from this menu. When running CPA campaigns, you don’t have to do this. Later, you can use this audience to show your ads again to the users which converted in your campaign.
  • Campaign Schedule - by default, this section is collapsed, but you can open it if you click on the section title, and then you’ll be able to pick days and times when you want your campaign to run.
  • Automatically start a campaign after moderation (takes up to 24 hours) - if you want to start the campaign as soon as it’s approved, check this box.
  • I declare and guarantee that my campaign meets the Quality Guidelines - make sure your campaign follows the rules before submitting it for review.
  • Start Campaign - once you are ready, hit this button to submit the campaign for review.

I did mention you might get away with direct linking with this ad format, but in case you need some landing pagesā€¦šŸ‘‡

Free landing pages​


šŸ’” TIP: Performance may vary depending on the survey type, so make sure your check those reports.
 

Launching a new Telegram Ads campaign​

Telegram Ads is the most recent ad format PropellerAds introduced (in the end of 2024).

Since there are more than 950 000 000 active users on Telegram already, this seems like a good new format to test. So, here’s how to do it.


  • Campaign Name - put whatever you want here. (or read this)
  • Add to folder - not required, but you can use this if you want to organize (or group) your campaigns.
  • Advertising Format - since this is a guide on how to create a Telegram Ads campaign, select Telegram Ads.
  • Pricing Model - you can choose between 3 pricing models here; CPA Goal, SmartCPC and CPC. If you plan to use the CPC pricing model, you might consider using an optimizer tool for your campaign.

  • Target URL - you’ll need to paste your Campaign URL (that you got in your tracker) here.
  • I have access to source code of this landing page - if you made your landing page, then you can check this box, but this is just an ad for Propush.
  • Frequency - in case you picked CPC bidding, you may limit how many times your ad will be shown to the user.
  • Countries & Bid - keep in mind that you can add more countries in the same row, as long as you want to use the same price for traffic. In my example, I’ve added Germany, and picked $0.07 for CPC cost.
  • Target by - you can also target different cities or states, if you want to.

  • Advertising Budget (USD) - The budgets are always set in USD currency. When starting out, I’d alway suggest you put some values under Daily budget and Total budget (or at least Daily budget). That way in case something is wrong with your campaign (maybe your tracking isn’t working correctly), at least you won’t burn all your budget because you see a mistake you made. There is also a nice feature available here - adding an alert when the remaining total budget is 20% or less.

  • Platform - you can choose between Mobile or Desktop (or choose both)
  • OS (operating system) - once you choose the platform, you’ll be able to pick the OS-es you wish to target. You can choose more of them. For example, if you choose Mobile as a platform, you’ll be able to pick Android here. As with most filters in Targeting, you can choose if you want to Include this or Exclude from your targeting.
  • OS Version - once you pick the OS, you’ll be able to choose the versions from this drop-down menu.
  • Device - this type of targeting is available only for iOS devices. iPad and iPhones are available if you choose iOS as OS.
  • Browser language - in case you want to show your ads only to users with specific browser language selected, use this targeting option.
  • Connection type - you can choose between 3G/LTE (which is carrier traffic) or WIFI. If you are running mVas, most of the time you’ll want to use the 3G/LTE option.
  • Proxy - by default, No Proxy is selected. If for some reason you want to include proxy traffic, you can choose that here.
  • Mobile ISP - if you want to pick the mobile carrier, you have to select the country first, and then 3G/LTE under Connection type.
  • Zone limitation - if you want to run a whitelist campaign, paste the zones here, and select Include. If you want to exclude (blacklist) some zones in your campaign, paste them here and select Exclude.


  • Collect an audience for retargeting - if you want to build an audience of converted users, you can do that from this menu. When running CPA campaigns, you don’t have to do this. Later, you can use this audience to show your ads again to the users which converted in your campaign.
  • Campaign Schedule - by default, this section is collapsed, but you can open it if you click on the section title, and then you’ll be able to pick days and times when you want your campaign to run.

Telegram Ads Creatives​

You’ll need to use some creatives for this ad format.


  1. Auto сreatives - if you are a bit lazy, you might try this option. The system will try to generate the best performing creatives for you.
  2. Title - You can use emojis in your title. The limit is 30 characters.
  3. Description - You can use emojis in your description. The limit is 160 characters.
  4. Icon - add an icon that is 256x256 pixels in dimensions. This is a required field.
  5. Big Image - You can add a square image also. The recommended dimensions are 900x900 pixels.
  6. Add another creative for testing - if you want to add more creatives, use this button. There is a limit of 8 creatives per one campaign.
You’ll see a preview of your ad on the right, like this:


And the last part of the form:


  • Automatically start a campaign after moderation (takes up to 24 hours) - if you want to start the campaign as soon as it’s approved, check this box.
  • I declare and guarantee that my campaign meets the Quality Guidelines - make sure your campaign follows the rules before submitting it for review.
  • Start Campaign - once you are ready, hit this button to submit the campaign for review.

šŸ’” TIP: Not so long ago, I’ve published a guide called ā€œšŸŸ” How to Launch Your First Telegram Ads Campaign on PropellerAds?ā€. You might want to read that if you're interested in Telegram Ads and some results.
 

Statistics page​

Let’s dive into the Statistics page - all your campaigns should be listed here.


Lot’s of filters and fields here - let me try to explain each of of them:
  1. Time frame selector - if you want to see the statistics for a certain period only (like last 30 days), use this menu.
  2. Time zone drop-down - in case for some reason you need to change the time zone for the statistics, this is where you can do it.
  3. Reload button - hit this button to reload the statistics page.
  4. Group by drop-down - by default, the statistics page will show data grouped by Campaign (Name column). But you can view the statistics per day for example, if you pick Date from this drop-down menu. You can choose to group statistics by Campaign, Creative, Date, Country, Zone, Survey Type or Folder.
  5. Traffic - use this filter to show all campaigns (even the ones that didn’t get any traffic) or just the ones that had some traffic.
  6. Campaign status - show only campaigns with selected statuses. You can choose between Draft, Moderation, Approved, Rejected, Working, Paused or Stopped. Or you can turn all them ON.
  7. Format - show only campaigns with selected ad formats. You can choose between Onclick, Push notifications, Interstitial, Survey Exit or Telegram Ads.
  8. Campaign name - performs a quick search based on campaign name (or partial campaign name)
  9. Advanced filters - by default, advanced filters are turned off, but you can turn on the 2nd rows of filters with this button (from Campaign ID to Archive status).
  10. Folders - opens a popup from which you can create new folders which you can use if you want to organize your campaigns into folders.
  11. Export to CSV - if for some reason you need these statistics in CSV format, hit this button.
  12. Edit columns - there are more than 20 columns available for the Statistics page. In case you want to turn some of the columns off (or on), use this popup.
  13. Search by Campaign ID - first advanced filters field. Performs a quick search based on the Campaign ID. Useful to quickly show 1 campaign in statistics.
  14. Target URL - You can filter campaigns by Target URL (for example, if you need to update the tracking domain for multiple campaigns at once)
  15. Pricing model - filter only campaigns that match selected pricing models. You can choose between CPM, SmartCPM, CPC, SmartCPC, CPA Goal and SmartCPA.
  16. Folders drop-down - in case you use folders, they will be available in this drop-down menu, so you can show only campaigns that belong to the selected folder.
  17. Country - shows only the campaigns that have selected countries selected in targeting options.
  18. Zone - if you want to show only campaigns that target specific zones, use this filter.
  19. Campaign status - if you want to show all campaigns (even the archived ones), you can select that from this menu.

    And now, let’s check the columns in the main table, below the filters.

  20. (Column) Select all - use the checkbox in the header row to select all campaigns, or the one in the single campaign row to select a single campaign. After that you can start or stop the selected campaign(s), duplicate them or archive. Nice feature if you need to for example stop multiple campaigns at once.
  21. (Column) Name - shows the campaign name together with a few additional information, like campaign status, ad format and status (if archived).
  22. (Column) Folders - you can add a campaign to a folder from this column, by clicking the + Add button.
  23. (Column) ID - The internal ID of the campaign (in PropellerAds). When you reach out to support with some questions about your campaign(s), usually they ask you for a campaign ID. This is the number you should give them. For other formats, like Onclick and survey exit this shows the number of redirects to your tracker. Remember, Onclick and Survey exit formats don’t use a creative (banner ad) that someone can click on - that’s why ā€œclicksā€ for those formats are called redirects (to your tracker).
  24. (Column) Impressions / Redirects - for formats like push notifications, interstitial ads or telegram ads, this shows the number of times your ads were shown.
  25. (Column) Clicks - this field is only available for push, interstitial and telegram ads campaigns. Show the amount of clicks your ads generated for selected campaign(s). You will see a zero value here for Onclick and Survey Exit campaigns here - check the Impressions / Redirects column for the amount of visits those campaigns sent to your tracker (Campaign URL).
  26. (Column) Conversions - shows the number of conversions for the campaign. You need to have a working postback set up correctly for this to work. Otherwise you’ll see a zero here all the time.
  27. (Column) CTR - this field is only available for push, interstitial and telegram ads campaigns. Shows the average click thru rate for selected campaign(s).
  28. (Column) CR - shows the conversion rate for the campaign. You need to have a working postback set up correctly for this to work. Otherwise you’ll see a zero here all the time.
  29. (Column) Rate - shows you bid here. If you have buying traffic on CPC pricing model, then you’ll see your CP bid here, for example. Keep in mind your actual CPC might be different (higher, or even lower) than the value you entered when you were creating a campaign.
  30. (Column) Win rate - shows the % of traffic you were able to buy (yesterday). If the % is low, that means you could potentially buy more traffic, usually by increasing your bid (or adjusting the daily budget).
  31. (Column) CPC - The average CPC you actually paid for this campaign. System will try to get you traffic for the CPC value you see in the Rate column, but as I mentioned before, the target CPC and the real CPC will usually be different.
  32. (Column) CPM - the average cost for 1000 impressions. (cost per mile)
  33. (Column) Cost - the (total) amount spent for a selected campaign in a selected time period.

šŸ’” TIP: If you can’t see some of these columns, click on the Edit columns button and check the list of available columns in that popup.
 

How to Track Costs with BeMob Tracker​

I already mentioned that there are 5 different pricing models available on PropellerAds platform:
And here are available pricing models per ad format in a table:

Ad FormatCPA GoalSmartCPCCPCSmartCPMCPM
OnClickCPA GoalSmartCPMCPM
Push NotificationsCPA GoalSmartCPCCPCCPM
Survey ExitCPA GoalSmartCPCCPC
Telegram AdsCPA GoalSmartCPCCPC
InterstitialCPA GoalCPCCPM

Now let’s see what Cost (tracking) models are available in @BeMob tracker:


There are 7 cost models available in BeMob. Now, this all might seem too much, but you’ll see it’s pretty simple in the end.

There is a reason why I marked CPM in red for Push Notifications and Interstitial ads in the table above. Those are the only 2 combos for which you can’t track costs with a BeMob tracker. The reason why you can’t track costs for those 2 combinations is because the ads (push or interstitial) are shown on a publisher website, and while your ad may be shown on that website 1 000 000, in theory there is a chance no one will click on your ads. Which means while your ad was shown a million times, there are no visits recorded in your tracker, so no costs have been passed from traffic source to your tracker.

It’s different for Onclick ad format - because CPM there means impression (or redirect), and that is an event where a visitor is sent to your tracker.

For all other combinations, tracking costs is pretty easy.

For all ad formats on PropellerAds, and all pricing models (except CPM for Push Notifications and CPM for Interstitial Ads), just select Auto as the Cost model in BeMob.


Tracking CPA Goal costs​

Yeah, I know. Many of you are asking yourself now - why don’t we select the CPA cost model for CPA Goal campaigns?

Well, the thing is the CPA goal campaigns in PropellerAds is that the CPA Goal campaign goes through a testing period, during which the algorithm tests ad placements and analyzes their conversion rate (CR) data. The algorithm does this to set up an efficient CPM bid. That means, in real-time, the system decides on the most effective CPM bid based on similar campaigns' CPM bids and expected traffic volumes.

It’s testing the placements on CPM basis, and tries to find the best CPM for your target CPA.

The testing period is there to determine which placements work with your offer (campaign). But on many occasions, there is a chance that your offer will not be good enough (low payout, low CPA bid, tracking not working, capped offer, etc.) which means that at some point your stop getting traffic. It would be great if you didn’t have to pay anything for this test, but in that case guys from PropellerAds wouldn’t be too happy, because you would be able to run tests for free on their network. That’s why you gotta pay for something - the test. Later, if your offer (campaigns) performs well, you could be getting continued traffic for a long period of time.

With CPA Goal campaigns - you will be charged on some sort of CPM cost - but that cost will usually try to match your Target CPA. That’s why it’s easier to use Auto as a cost model.

You can read more about CPA Goal algorithm here.


Let me put all that in one table:

Ad Format (PropellerAds)Pricing model (PropellerAds) Cost model (BeMob)
OnclickCPA GoalAuto
OnclickSmartCPMAuto
OnclickCPMAuto
Push NotificationsCPA GoalAuto
Push NotificationsSmartCPCAuto
Push NotificationsCPCAuto
Push NotificationsCPMn/a
Survey ExitCPA GoalAuto
Survey ExitSmartCPCAuto
Survey ExitCPCAuto
Telegram AdsCPA GoalAuto
Telegram AdsSmartCPCAuto
Telegram AdsCPCAuto
InterstitialCPA GoalAuto
InterstitialCPCAuto
InterstitialCPMn/a

Simple, right?


Traffic loss​

You’ll encounter traffic loss with all traffic sources, pricing models and ad format. That means the costs you see on your traffic source will not match the costs in your tracker. There will be some differences - usually around 10-20%, but it can be more (or less).

Nick wrote a great guide about this, you can read it here:


šŸ’” TIP: If you still want to buy traffic on CPM model for Push notifications or Interstitial campaigns, you might consider using an optimizer tool for your campaign.
 

How to Track Costs with Skro Tracker​

For all ad formats on PropellerAds, and all pricing models (except CPM for Push Notifications and CPM for Interstitial Ads), just select Auto as the Cost model in @Skro tracker, like this:


Let me put all that in one table:

Ad Format (PropellerAds)Pricing model (PropellerAds) Cost model (Skro)
OnclickCPA GoalAuto
OnclickSmartCPMAuto
OnclickCPMAuto
Push NotificationsCPA GoalAuto
Push NotificationsSmartCPCAuto
Push NotificationsCPCAuto
Push NotificationsCPMn/a
Survey ExitCPA GoalAuto
Survey ExitSmartCPCAuto
Survey ExitCPCAuto
Telegram AdsCPA GoalAuto
Telegram AdsSmartCPCAuto
Telegram AdsCPCAuto
InterstitialCPA GoalAuto
InterstitialCPCAuto
InterstitialCPMn/a

šŸ’” TIP: If you want to know more about CPA Goal cost tracking or traffic/click loss, I suggest you read the previous post where I explained that. (or why you can’t track CPM costs for Push Notifications and Interstitial Ads).
 

How to Track Costs with MaxConv Tracker​

For all ad formats on PropellerAds, and all pricing models (except CPM for Push Notifications and CPM for Interstitial Ads), just select Auto as the Cost model in @MaxConv tracker, like this:


Let me put all that in one table:

Ad Format (PropellerAds)Pricing model (PropellerAds) Cost model (MaxConv)
OnclickCPA GoalAuto
OnclickSmartCPMAuto
OnclickCPMAuto
Push NotificationsCPA GoalAuto
Push NotificationsSmartCPCAuto
Push NotificationsCPCAuto
Push NotificationsCPMn/a
Survey ExitCPA GoalAuto
Survey ExitSmartCPCAuto
Survey ExitCPCAuto
Telegram AdsCPA GoalAuto
Telegram AdsSmartCPCAuto
Telegram AdsCPCAuto
InterstitialCPA GoalAuto
InterstitialCPCAuto
InterstitialCPMn/a

As you can see, the Auto cost model for cost tracking will do for all trackers I’ve mentioned here.

šŸ’” TIP: If you want to know more about CPA Goal cost tracking or traffic/click loss, I suggest you read the BeMob cost tracking post where I explained that. (or why you can’t track CPM costs for Push Notifications and Interstitial Ads).
 
Top