Conversion Tracking
If you want to see conversion on the
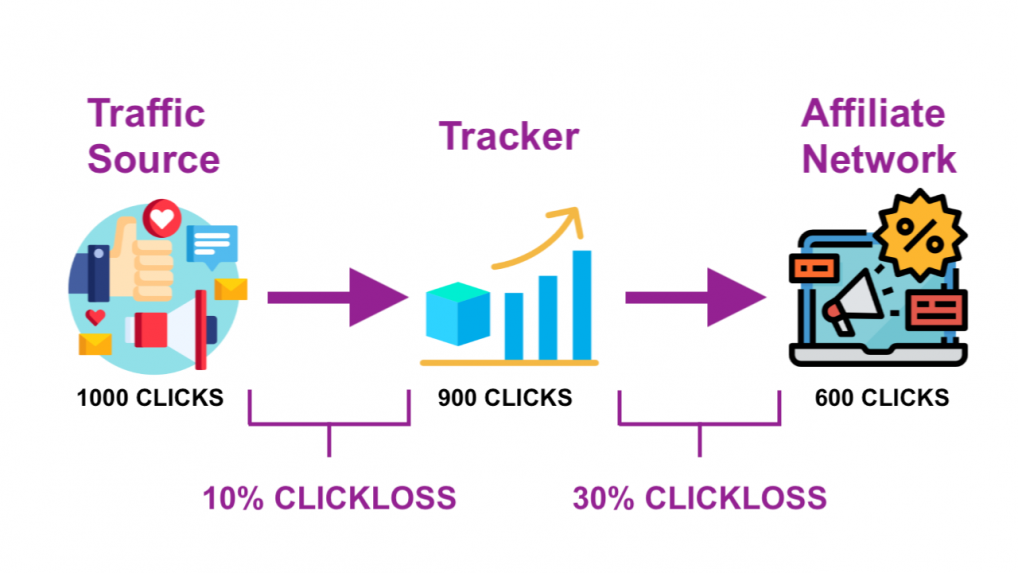
PropellerAds statistics page or run campaigns on CPA Goal pricing mode, you must have a working Postback URL set up correctly. This means your tracker must post conversions back to your
traffic source.
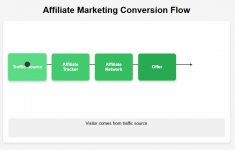
Here is a simple flow:
To make sure everything is properly set up, you can use the
Conversion Tracking page for testing. Hopefully, by now you have added
PropellerAds as traffic source to your tracker and you’ve also added the correct Postback URL as I’ve explained in this guide.
Conversion Tracking with BeMob tracker
Ok, let’s start with
@BeMob. You’ll need to create a test campaign in
BeMob. For this test campaign you won’t need a landing page or the offer. The only thing we need is to generate a test visit from PropellerAds traffic source to your tracker. Once we have at least 1 test visit visible in the tracker, we can generate a test (fake) conversion in your tracker, and then if your Postback URL is correct, your tracker will post back that conversion to the traffic source.
Open the Campaigns page in BeMob and click on the + New button.
You’ll see a Create Campaign popup, like this one:
As you can see, we need to fill out a few fields here, for this test campaign:
- Name - put whatever you want, I used “Conversion Test”
- Make sure you select PropellerAds as your traffic source
- Select Built-in Flow
- Turn off the checkbox for Landings
And for the “offer”, you can just create an “offer” that redirect to Google, like this:
Save this campaign. You’ll get the campaign tracking link in a popup like this one:
Click on the Copy button near the Campaign URL. You’ll need to paste this URL in the
PropellerAds Conversion Test page:
Paste that URL in the “1. Enter the target URL used in the campaign you want to test” field. After that, click on the “Create test banner” button.
A new tab will open with a banner like this one:
Click on that banner. You’ll be redirected to your Campaign URL (and if you’ve used google.com URL as the “offer” page, your tracker will redirect you to Google).
Now, you should have at least 1 test visit in your tracker - the one you just made by clicking on that banner.
Find that test campaign in your tracker and double click on it. A report will open.
Select Live Visits from the drop down menu. Your test visit should be there, like this:
If it’s not, refresh the page a few times. It usually comes up within a minute or two.
See that Click ID? In my example it’s “S7PGeLA7qHEyjGBWTb9C2V”, yours will be different.
Copy that Click ID - you’ll need it soon.
Click on the settings (gear) icon near your name in the top right corner to open the
Settings page, and select
Upload Conversions from the menu then:
Paste that Click ID in this field:
And click on the Upload button. You should see a small popup saying your conversion was uploaded successfully.
Now go back to your campaign, and select Conversions from the main menu:
You should see your conversion there. If not, wait a minute or two and reload the page.
That means the conversion is added to your tracker. Let’s see if the tracker was able to successfully post back those conversions back to the traffic source. You can check that from the Postbacks tab.
And yes it was! Status code 200 means the postback was successful.
The last thing you’ll want to check is the
Conversion Tracking page in PropellerAds.
Hit the Update button.
And you should see something like this. If not, try again a few times. If you don’t see a conversion here in the next 15 minutes, it might be that your Postback URL is not correct.
You are now ready to run campaigns on CPA Goal pricing model!
Conversion Tracking with Skro tracker
If
@Skro tracker is your weapon of choice, you’ll want to complete these steps so you can run CPA Goal campaigns.
First, you’ll need to create a test campaign. Select Campaigns from the left menu, and then click on the + Create button.
Select PropellerAds as your traffic source:
Select Master as Workspace and give your campaign a name, like this:
Select a test (fake) offer for this campaign (or use a real one), like I did:
You don’t need a landing page for this test, so select Use offers only. Once you click Save, you’ll see a popup like this one:
Click on the COPY button near the Campaign Tracking URL. You’ll need to paste that URL on the
Conversion Tracking page in PropellerAds:
Paste the URL and then click on the Create test banner button. A new tab will open with a banner like this one:
Click on the banner, and you’ll be redirected to your
Skro Campaign URL. Which means there is now a test visit in your Skro reports for this test campaign.
If you see at least one visit there, open the
Clicks report from the left menu and find the Click ID for that visit.
In my example, Click ID is “cvhrs43ececc73dbg66g” - yours will be different.
Mark that Click ID and then click on the + Add Conversion button, like this:
You’ll see a popup similar to this one:
Enter any value under Payout (it can be zero) and click on the Add button. And the conversion should be sent back to your traffic source.
To be sure, go to
Postbacks report page, and look for that Click ID:
If you see a 200 OK in the Status column, that means your postback was successful.
The last thing you’ll want to check is the
Conversion Tracking page in PropellerAds.
Hit the Update button.
And you should see something like this. If not, try again a few times. If you don’t see a conversion here in the next 15 minutes, it might be that your Postback URL is not correct.
You are now ready to run campaigns on CPA Goal pricing model!
Conversion Tracking with MaxConv tracker
And now let’s see how we can do this with the
@MaxConv tracker.
Select Campaigns from the main menu and click on the + Create button.
Enter a name for the campaign, select the traffic source and click on the Next button.
Turn off the Landers. For the “offer” you can put whatever you want. Click on the Save button.
Click on the Copy button near the Campaign URL. This is the URL you’ll need to paste in the
PropellerAds Conversion Test page.
Paste the URL into the “1. Enter the target URL used in the campaign you want to test” and then click on the “Create test banner” button.
A new popup will open. Click on that banner. You should be redirected to your Campaign URL from that banner, which means your
MaxConv tracker should have at least 1 visit recorded now for that test campaign.
Refresh the campaign page, and you should see that test visit.
Open the Events report and you should be able to see your test visit there:
Copy that Click ID - you’ll need it soon. In my case it’s “m8oq7f4ilkuberunyoz7wjh16u” - yours will be different.
Now, open the Conversions page in MaxConv, and click on the + Upload button:
In the popup, paste that Click ID.
And click on the Upload button. You should see a notification that conversion was successfully uploaded.
Let’s check that. Hit the Refresh button on the
Conversions page.
And there it is. This just means a conversion is added to MaxConv tracker. We still need to check if the tracker was able to post back that conversion back to traffic source.
Open the Events report and you should see something like this:
Looks like everything is fine. Let’s check the
PropellerAds Conversion Test page:
Hit the Update button.
And there it is. Everything works fine.
You are now ready to run campaigns on CPA Goal pricing model!

TIP: If you want to run campaigns on CPA Goal pricing model, make sure you complete this step first.







 Your Ultimate Landing Page Collection Awaits!
 How to host your landing pages without a server
 Mega post of
  “Share on WhatsApp” Popup for Landing Pages